Resin Tables: Materials
Had a few days off work around mid-March and went shopping for some base materials that I needed. This post summarizes the cost of the materials along with some important things to note for this project.
Overall the consumable materials to produce a single resin table is broken down into 2 categories:
- Materials to build the table itself.
- Materials to build the mold for the resin table.
1) Materials for the Table: A&M Wood Specialty Shop
To build the table itself, I need a few things:
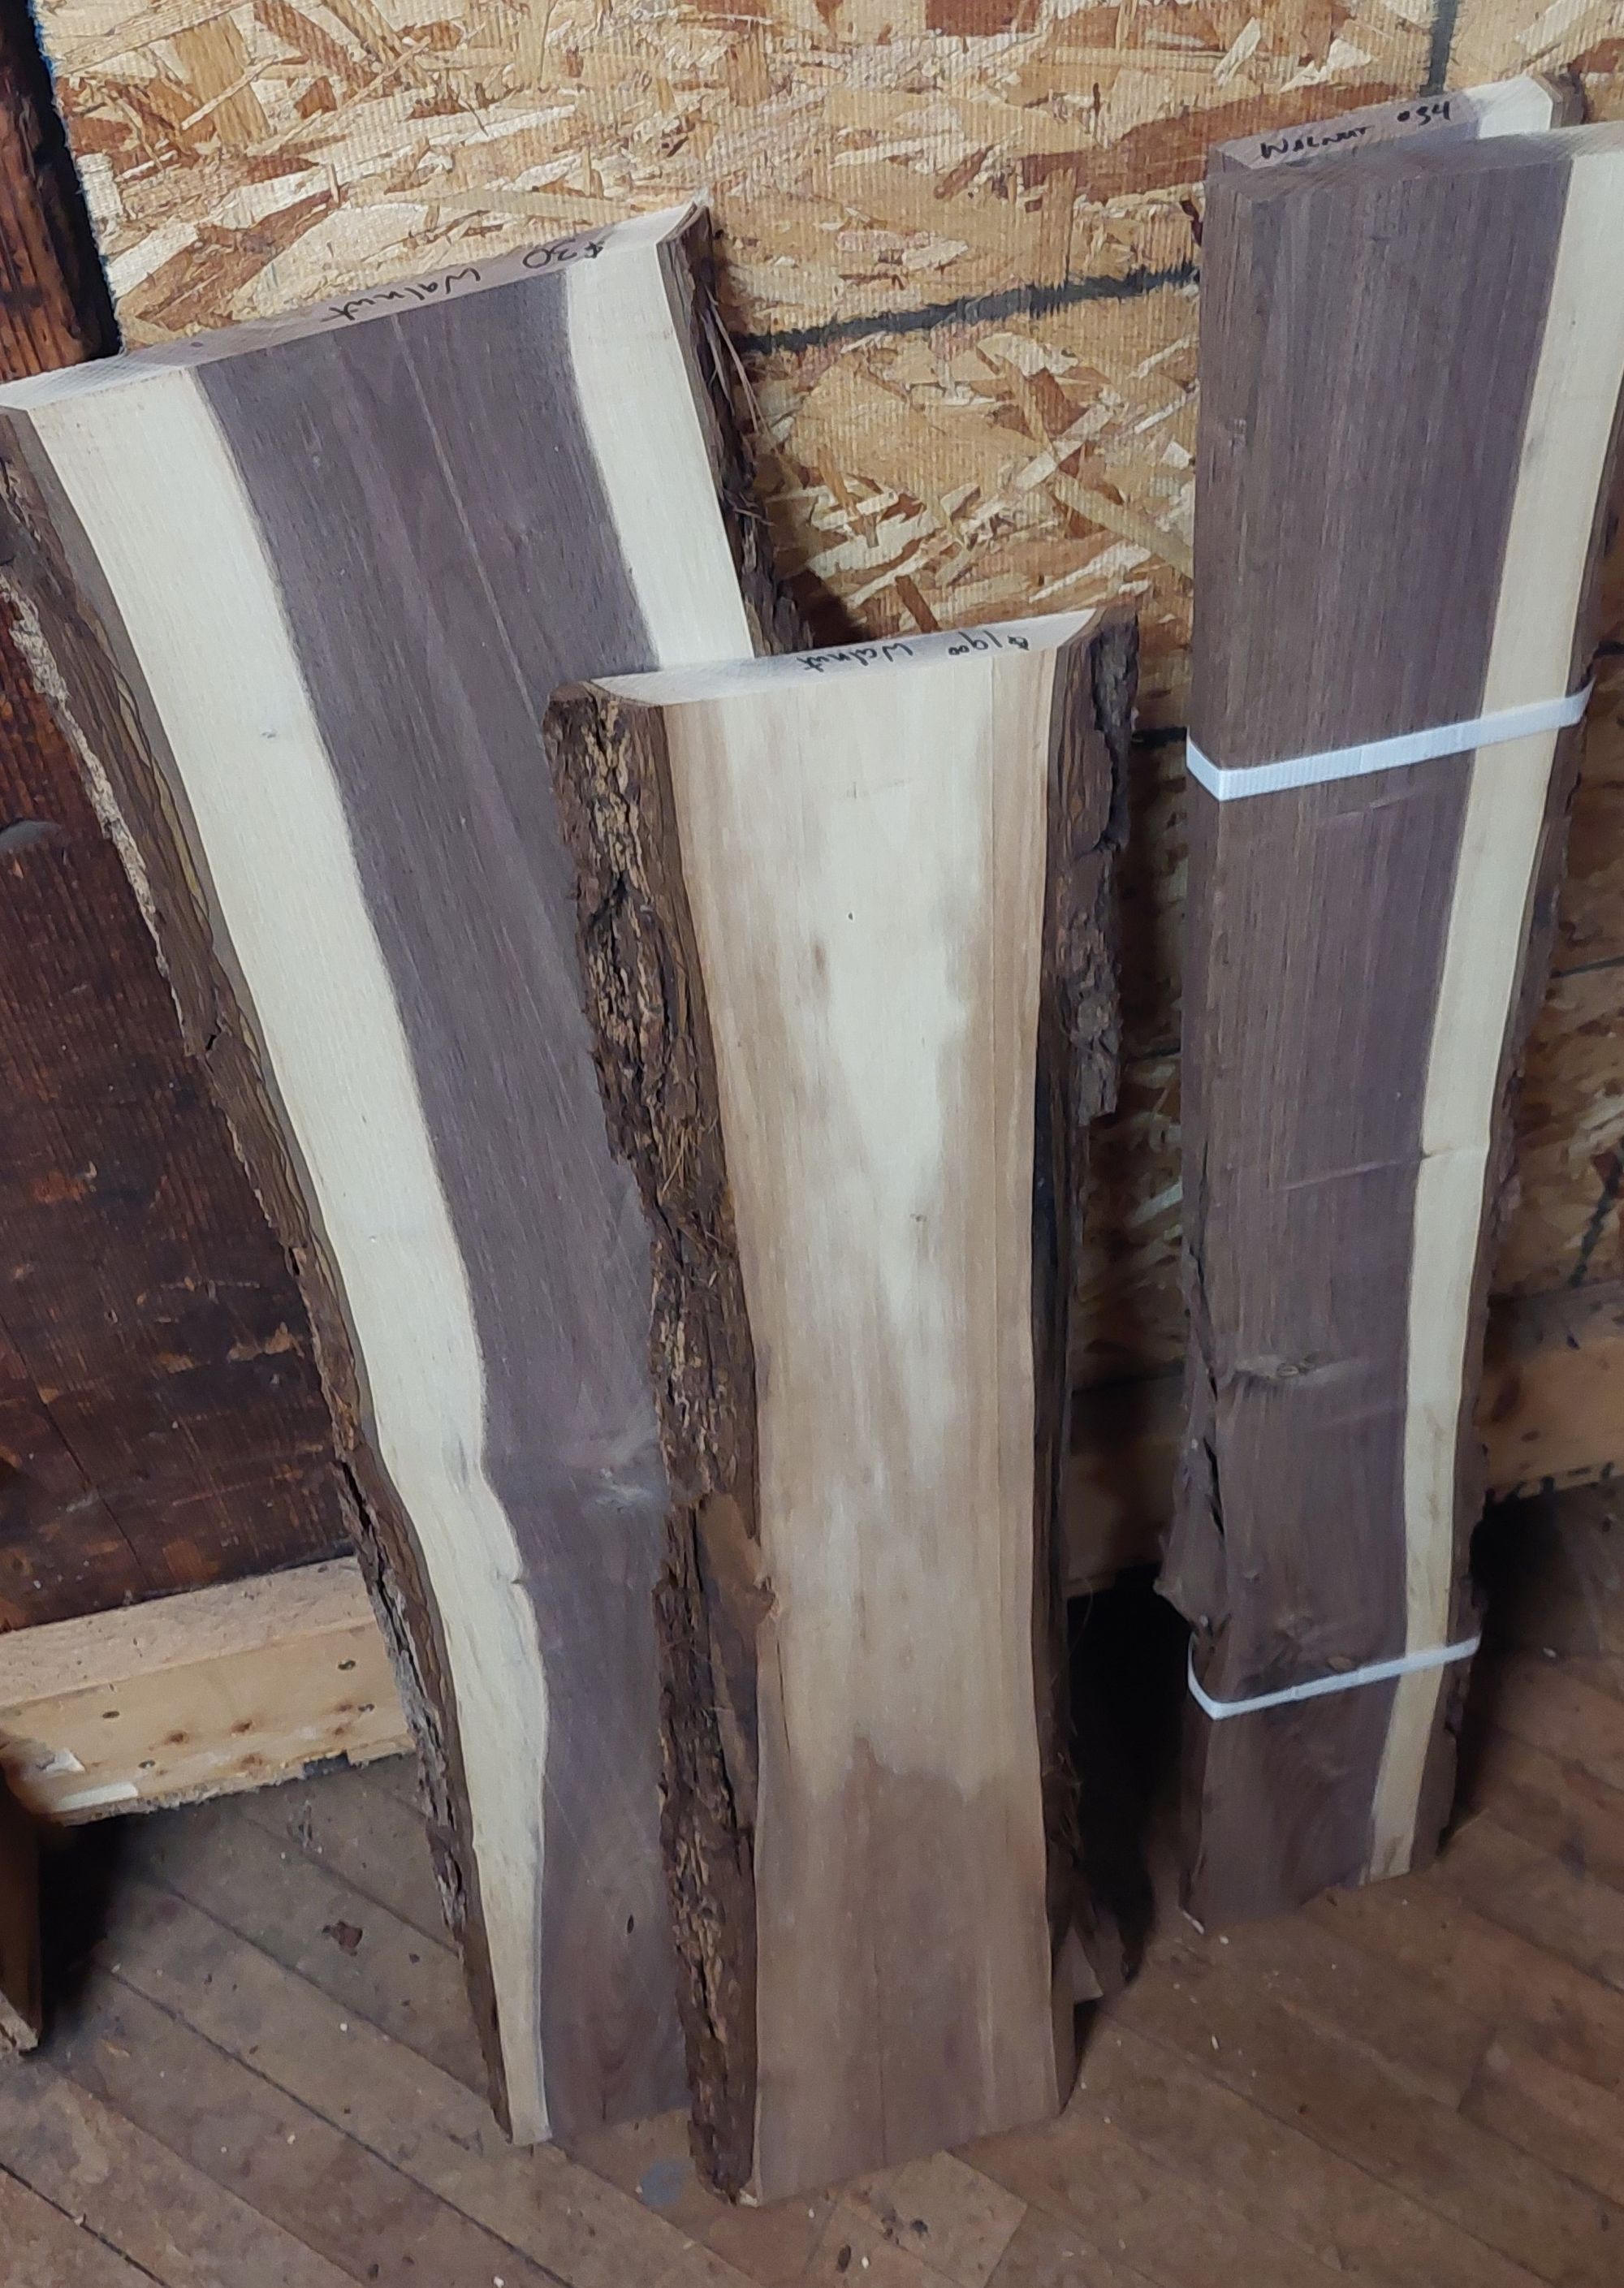
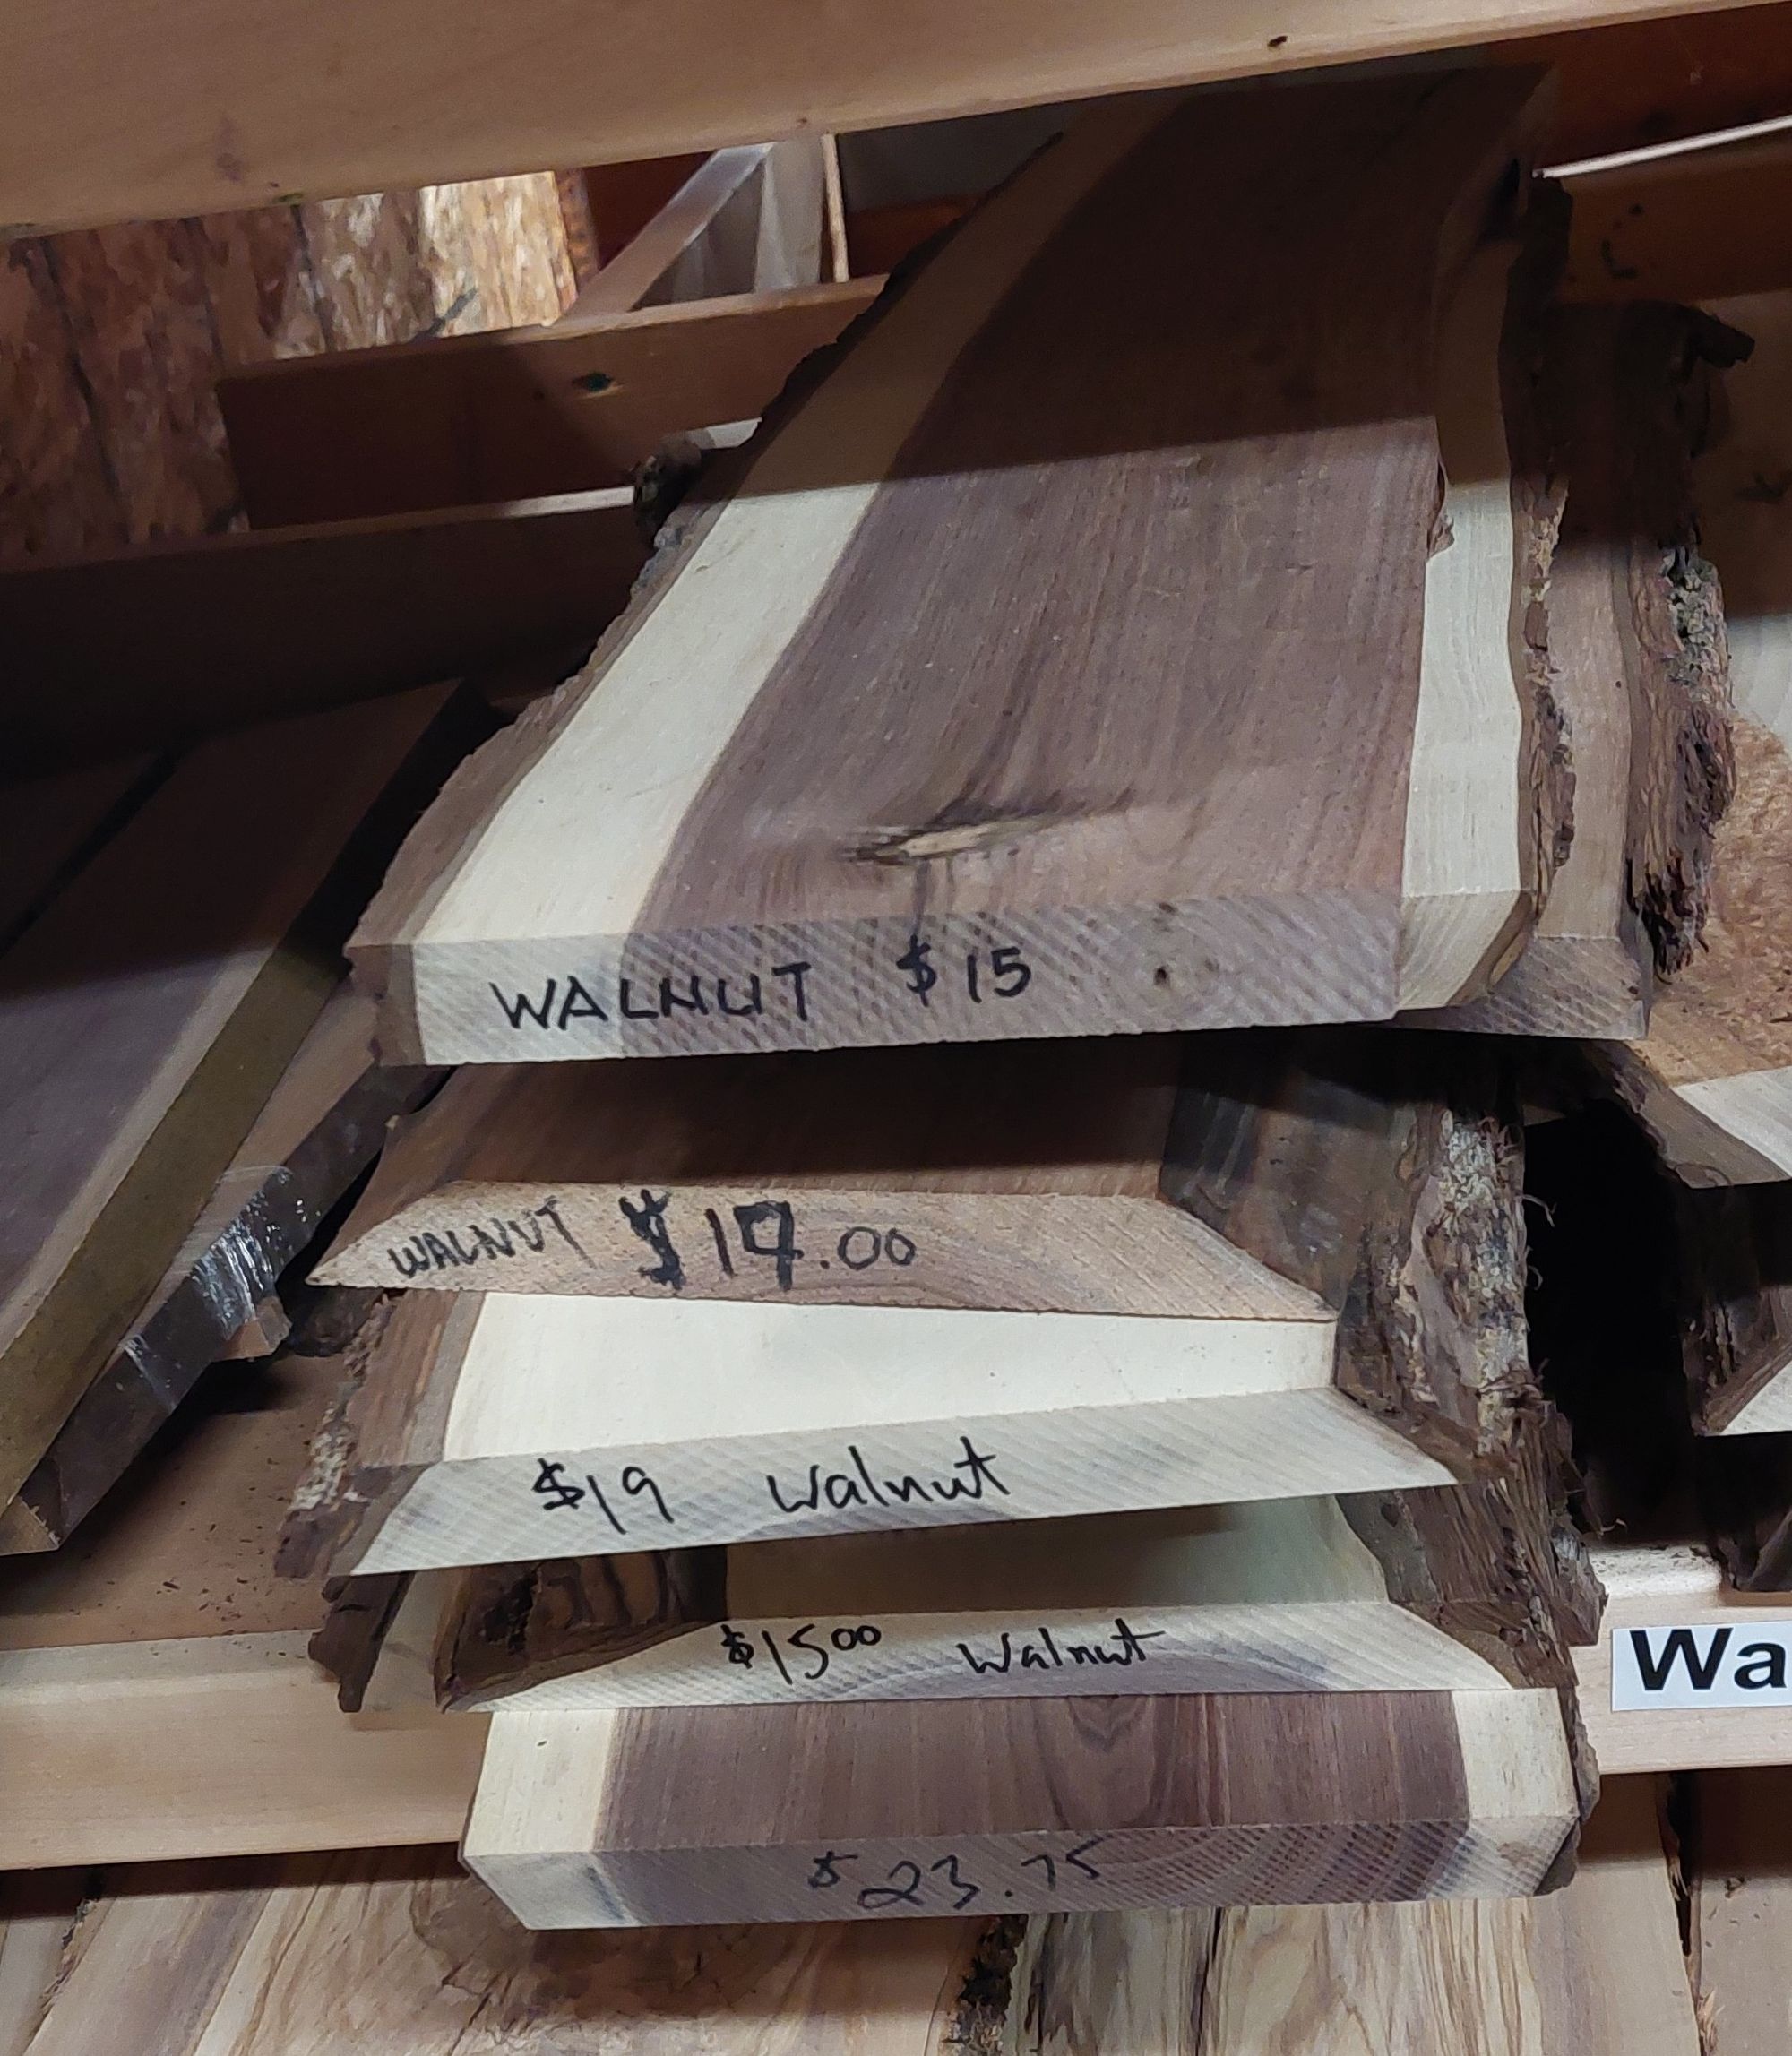
- $20, Kiln dried live edge wood (Walnut).
- $175, Resin (3L, Ecopoxy) - Needs to be safe for contact with food/consumables. Needs to be approved to do thick pours.
- $27, Resin dyes (assorted set, Ecopoxy) - To colour the resin pour.
- $27, Oil (satin) - To apply a protective finish.
Live edge wood is more expensive since this is real cut of wood with all the wood grain textures and not made of wood particles or composites like melamine or masonite. A lot of tutorial resin table videos show different cuts of wood you can use. For this project I went with black Walnut as that was one of the most common cuts I saw in tutorials and felt like a safe bet for a first time table. Note that live wood is a lot more expensive. A quick Google search might have you gasping as you'll see prices around $1000. But note, that these are LARGE cuts of wood. Enough to make you even 3 large dining tables. Possibly 5 small ones. I bought a small $20 cut that would produce me a table 13 by 23 inch table. A good deal to me. The wood also needs to be kiln dried. A video I came across mentioned the importance of this. Kiln drying is necessary since bugs will burrow in the wood. Without kiln drying, you'll have bugs and moisture trapped in your resin table. Even if they are not visible and are trapped in the resin cure, they can still find their way out and cause issues. Not something you'll want for your beautiful table.
Resin can have 2 forms, one intended for thin pours (less than 1/8 inch thick) and another for thicker pours (0.5-1.5 inch thick). You need to also pick a resin that the end result is safe to have food products on since the design is intended to a table that will likely have food on it. I bought a 3 litre set of Ecopxy resin and hardener (2L resin, 1L hardener).
2) Materials for the Mold: HomeDepot
- $30, Melamine wood (3/4in thick, 2 by 4ft) - To build the structure of the mold. Tip: Have HomeDepot cut this into the sizes you need before paying and leaving.
- $4, Caulk (fast dry, 300ml) - To liquid seal the edges of the mold and prevent resin from seeping out. (This is the same material used on the edge of bath tubs, etc.). Lots of money loss and problems will happen if you have a leak in your mold.
- $10, Tuck tape - To act as a mold release. The resin will still stick to the melamine. Tuck tape is a good mold release when pulling off the mold after the curing process. There is also a mold release spray many use, but I opted for the tape to cut some costs.
Stay tuned for the mold build process in the next post!